Introduction
In the realm of open-source, documentation has a crucial role. Documentation boosts user adoption and fosters collaboration. That's why we're excited to share our exploration of Docsify. Docsify is a simple and lightweight documentation site generator. In this article, we are going to explore docsify.
What is Docsify ?
Docsify is a documentation site generator that is simple, lightweight, and easy to use. It converts Markdown files into a static website with no build process required. This makes it a great choice for creating documentation. Also for open source projects, personal websites, and more. It helps create beautiful, responsive, and customizable documentation websites with ease.
Why using Docsify ?
Markdown Compatibility: Docsify supports Markdown. This allows you to write documentation using a simple and familiar syntax. Making it accessible for all team members, including non-technical folks.
Single-Page Application (SPA): Docsify creates a single-page application for your documentation. There are no page reloads, resulting in a smooth and fast user experience.
Customizable Themes: Various themes, and you can also create your own. It allows you to make your documentation stand out.
Automatic Sidebar and Navigation: It generates navigation menus and a sidebar. This by based on your documentation structure. It saves time and ensures the documentation organization.
Full-Text Search: A key feature of Docsify is its built-in full-text search functionality. Users can find what they're looking for. It improves the usability of the documentation.
Demonstration
Installation of Docsify
To install Docsify, you can use the following command, make sure you have Node.js installed. If not, install Node.js. This command will install Docsify globally, so you can use it from anywhere on your system.
Create a new folder and open it in Visual Studio Code. Type the following command
npm i docsify-cli -g
Initialization and deployment
To deploy Docsify, you can use GitHub Pages, or any other tool (e.g. Vercel, Netlify etc). To do this, you will need to create a new folder. Initialize it with Docsify by running the following command:
docsify init
If you want to write your documentation in a specific folder, like docs for example, run:
docsify init ./docs
This will create a new index.html file indocs. You can edit this file to configure your Docsify documentation.
Here is a minimalistic configuration of the index.html
<!DOCTYPE html>
<html lang="en">
<head>
  <meta charset="UTF-8">
  <title>Ducumentation OSS Culture</title>
  <meta http-equiv="X-UA-Compatible" content="IE=edge,chrome=1" />
  <meta name="description" content="Description">
  <meta name="viewport" content="width=device-width, initial-scale=1.0, minimum-scale=1.0">
  <link rel="stylesheet" href="//cdn.jsdelivr.net/npm/docsify@4/lib/themes/vue.css">
</head>
<body>
  <div id="app"></div>
  <script>
    window.$docsify = {
        themeColor: "#fefefefe",
        name: "OSS Culture",
        repo: "geoffreylgv/oss-culture",
        relativePath: true,
        subMaxLevel: 3,
        search: "auto",
      };
  </script>
  <!-- Docsify v4 -->
  <script src="//cdn.jsdelivr.net/npm/docsify@4"></script>
</body>
</html>
Once you have configured your Docsify documentation, type the following command to deploy.
docsify serve docs
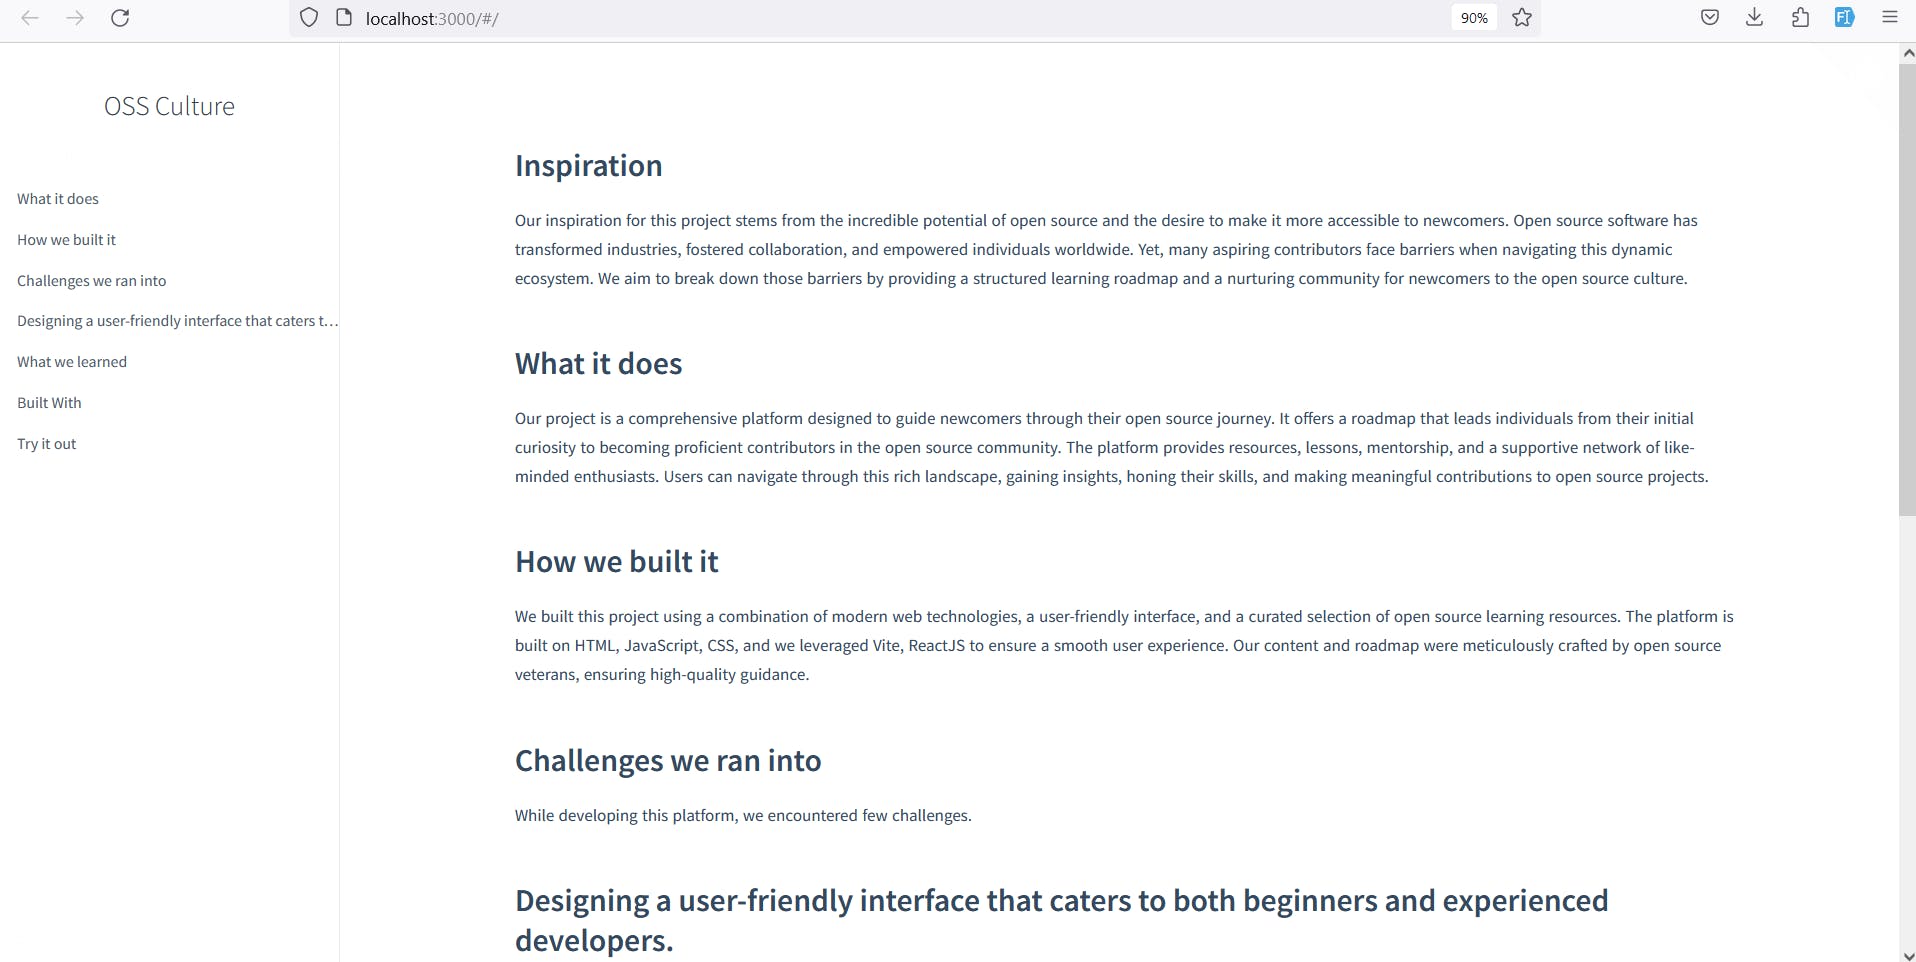
This will deploy your documentation, go to the browser and type localhost:3000 to preview.

Conclusion
Docsify is a great documentation site generator. Great for open source projects and personal websites, even to showcase workshop presentations. It is simple, lightweight, and easy to use. Remember, clear and concise documentation bridges your project with its users and contributors. Adhere to metrics and units and remove non-essential fillers. In open source, a well-documented project thrives. Docsify is a valuable asset on this journey.
